YEA Lesson Library
It Was Good!
About This Lesson
This lesson teaches that the Eternal God created everything in a logical, sequential order. It was colorful and good!
Scriptures
Genesis 1:1-25
Psalm 90:1-2
Psalm 95:3-5
Isaiah 45:18
Colossians 1:16
Hebrews 11:3
James 1:17
Revelation 4:11
Revelation 10:6
Words to Know
ARTIST - someone who is very good at painting or creating
SCALY - like the thin, flat plates that cover most fish
TRUMPET - musical instrument making a loud sound
The Lesson
Carmen loved art class. He new teacher let the class do many fun things. Today they were working with clay. Mrs. Craft gave everyone a ball of clay. She said, "Squeeze and pound the clay to make it soft.” She said they could make anything they wanted from the clay.
Carmen didn't know what to make. Some kids made bowls and vases. Some rolled their clay into long snakes. Others made flowers and animals. But all Carmen made was a bumpy ball!
Mrs. Craft looked at what everyone had made. "Oh Sarah, what a pretty flower," she said. "Tomorrow you can paint it." She stopped at Allen's seat. "That looks like a rattlesnake. I hope it doesn't bite!"
Mrs. Craft came to Carmen’s seat. She wanted to hide her bumpy ball of clay. Then Mrs. Craft said, "Oh Carmen, you made a world." Carmen was surprised. "There are mountains and valleys. You can paint the water blue. Paint the land green and the mountains brown.”
We know Carmen's world wasn’t the real world. She just made one out of clay. Only God can really make a world.
Before there was anything else, there was God. No one made God. He always was there. And our God wanted to be a Father. But God's family had to have a place to live. So, God just said, "I want a world," and the world was made. He didn't need clay. He just spoke and it happened Just like that! What a wonderful God we have!
God made mountains and valleys, just like Carmen. He made night and day. God put the sun and moon in the sky for light. He put stars in the night sky and fluffy white clouds in the daytime sky. All this was good.
Carmen colored her world with paint. God colored His world with green grass and trees. He colored the sky blue. Clear water ran down mountains over brown rocks. He put blue-green water in lakes and oceans. It sparkled in the sun. He put little splashes of pink, red, yellow, and purple flowers everywhere. It was so beautiful!
God's world was too quiet. So He made all kinds of birds. They each had a different song. He made great gray elephants. God gave them a voice like a trumpet. God made cats of all sizes, from lions to kitty cats. They all made different sounds. He made furry animals and scaly animals. Some had stripes and some had spots. Now the world was full of sounds and colors!
God put animals on the land and in the water. He put snakes in the grass. Snaky eels swam in the water. He filled the water with all kinds of animals and fish. Some had fins and some had shells. Some even had legs!
God told animals, birds, and fish to have babies. He wanted to fill His whole world. He wanted many of everything. He looked around and said, "it is good!"
Just think of all the colors God used to make this world. He used every color in the biggest box of crayons. God is a real artist! He made everything. And everything belongs to Him.
Student Prayer
Dear Heavenly Father,
You are so big, strong and mighty that you could create the whole world. Thank you for making all these beautiful things for m e to enjoy.
In Jesus' name.
Amen.
Daily Devotions
Sunday - James 1:17
Monday - Psalm 95:3-5
Tuesday- Isaiah 45:18
Wednesday - Psalm 90: 1-2
Thursday- Colossians 1:16
Friday- Revelation 4:11
Saturday - Revelation 10:6
Objectives
At the end of this lesson, children will be able to:
1. State that God existed before there was anything else.
2. Tell that He created the world and everything in it out of nothing.
3. Explain that everything God made was good.
4. Recite their memory verse.
Topics & Themes
Animals
Creation
Creator
God, Eternal
God’s Family
God’s Omnipotence
Materials Needed
Bible, Students' and Teacher's books, attendance and memory verse charts, stars or stickers, songbook, CD, music player, butcher's paper, marker pen, clay, construction paper, posters, large box of crayons
Preparation
This is the first lesson in the book of beginnings. Start off on the right foot by decorating your classroom with colorful pictures of animals, flowers, and children involved in outdoor activities. Kids are fascinated with nature, so learning about God's creation is a perfect way to help them understand the God of creation.
Arrive early enough to put your classroom in order: arrange chairs and place a new attendance and memory verse chart on the wall at the children's eve-level. As children arrive, greet them warmly and ask them if they know other children in the class. Encourage them to get acquainted with each other.
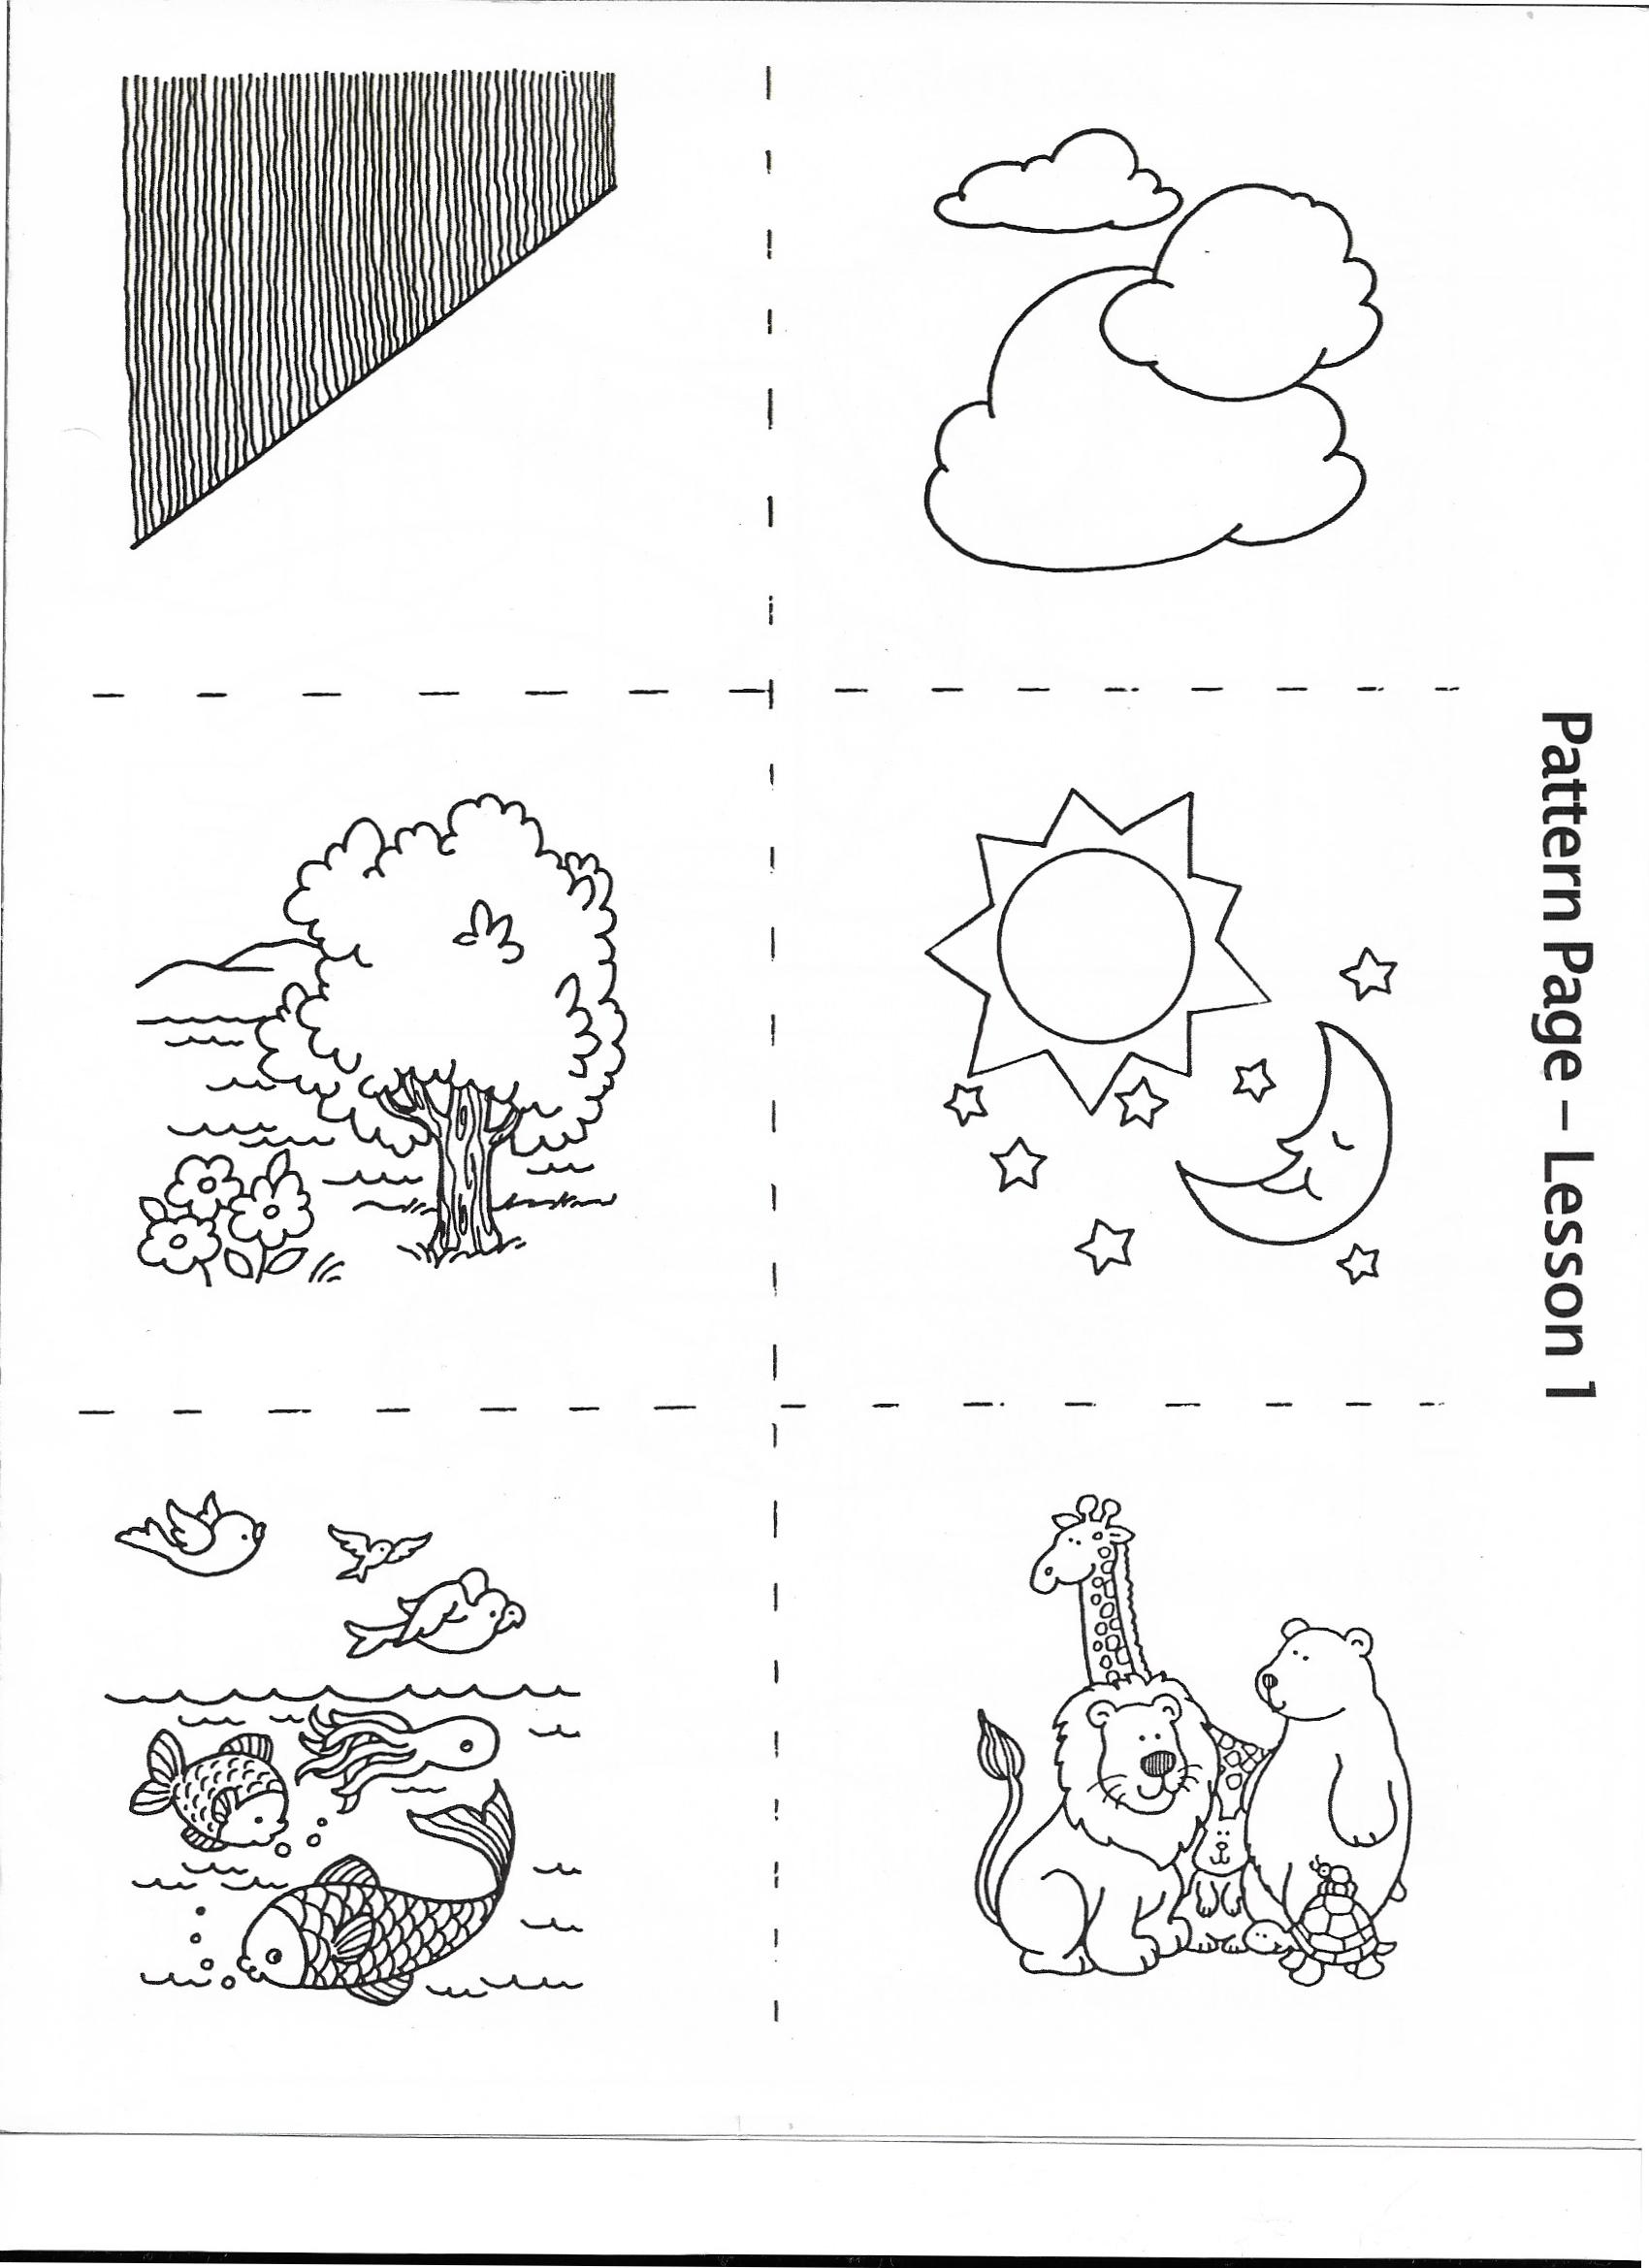
Before you come to class, photocopy the creation cards (located on the pattern page) onto construction paper and cut them apart on the dotted lines.
How to Teach This Lesson
The first thing God told us about Himself in the Bible is that He is the Creator. We learn much about God through Creation. We see His authority and power as He speaks a universe into existence. We get a vision of His wisdom, creativity, and caring as He lays out the orderly plan for creation. We learn that we can trust Him as we see His plan unfold.
Genesis does not give an ultra-detailed scientific explanation about the how of creation. But the Bible leaves no doubt about the Who of Creation. It was the Almighty, Everlasting I Am who spoke the worlds into being.
Secular education has been instrumental in creating doubt in the minds of young believers. Its theories and speculations lead many to question the existence of God. But, as a watch suggests a watchmaker, so, too, the universe demands a universe maker. The beauty around us did not just happen. It was planned and skillfully executed by God's own hand. We don't have to accept the existence of God on faith; all of His creation points to the fact that He is, was, and ever shall be.
Use the creation cards to demonstrate the thoughtfulness and planning that went into creation.
God started by speaking the worlds into being. Everything was dark and shapeless, much like Carmen's lump of clay. (Place a lump of gray clay on the table before the students.) The first thing God did was to create light and divide the light from the darkness. Remember that God was creating the world as a place for His family to live. If they were to see all the beauties of His creation, there must first be light. [Stress the importance of planning and sequence. Each element of creation is dependent on the thing(s) preceding it.]
The second thing God did was to divide the waters. He put some in the sky, as clouds and atmosphere, and some on earth. God knew His future family would need water to drink and everything would need water to live. So, God created water before anything else.
On the third day, God molded the world into lakes and oceans, rivers and mountains. (Allow one or more children to mold the lump of clay.) He gathered the water into the lakes, rivers, oceans, and streams. God also filled the whole earth with color, like this box of crayons. (Show all the colors in a large box of crayons.) He made the grass and trees, each one a different shade of green. He made the beautiful flowers in red, pink, yellow, orange, purple, and blue. Ask: What do you think would have happened if God had made the flowers and grass before He made the water? They would have died. God had a plan for everything He made.
On day four, God placed the sun, moon and stars in the sky to give light for the night and heat to help everything grow. Just think how many stars you can see on a dark night. God made each and every one of them.
On the fifth day, God filled the water with all kinds of fish and other sea creatures. (Have students draw on butcher's paper everything they can think of that lives in the water.) He also made the birds and gave each one a different song to sing. (Have students draw as many different colors of birds as they can think of.) Now God had a very colorful world!
God was very busy on day six. He began making the animals. There were big ones and small ones, furry ones, and smooth ones. God made everything from armadillos to zebras. Everything that He made had everything that it needed - food, water and shelter. And everything that God made was good!
Review Questions
Mix up the creation cards and place them on the table. Ask for a volunteer to place them in the order of creation. (This can be repeated several times as time permits.)
1. When did God begin? (He had no beginning; He always was.)
2. Why did God create the universe and everything in it? (He wanted a family and knew they would need a place to live.)
3. How do we know that God made everything? (The Bible tells us, we have faith, and we believe what God says.)
4. What did God think of the universe He created? (It was good!)
Teacher-Directed Activity
Give each student a piece of modeling clay and ask them to make something that was discussed in today's lesson (animal, fish, bird, snake, world, etc.)
REACH Activity
Special materials needed:
Small box, plaster of Paris, cotton balls, carton of oatmeal, painted board, animal pictures, flour, salt, cream of tartar, glitter, food coloring, pan, spoon, heat source, floured board, wax paper, flashlight, any kind of seeds, plastic cup/container, soil, water, paper, staples, old magazines, hanger, foil, poster board, tape recorder, cassette tape
Make a diorama of creation week.
Diorama Directions:
To construct a diorama, find a medium-sized box. Mix some plaster of Paris to make hills and valleys. Put twigs from trees or pieces of cedar (for trees and bushes) into the plaster while it is still wet. After the plaster dries (one to two days, depending on how much plaster is used), paint the set with tempera paint.
Day 1: Using a small box, form the land and water areas out of plaster of Paris.
Day 2: Paint the dried plaster with tempera paint. Paint waterways, mountains, and grasses.
Day 3: Make animals out of clay. Find out about the animals and share your information with friends and family.
Activities
1. Hang stars, moon, clouds, and sun. Make stars and moon from white construction paper, the sun from yellow construction paper, and the clouds from cotton balls. Suspend these heavenly bodies with a string.
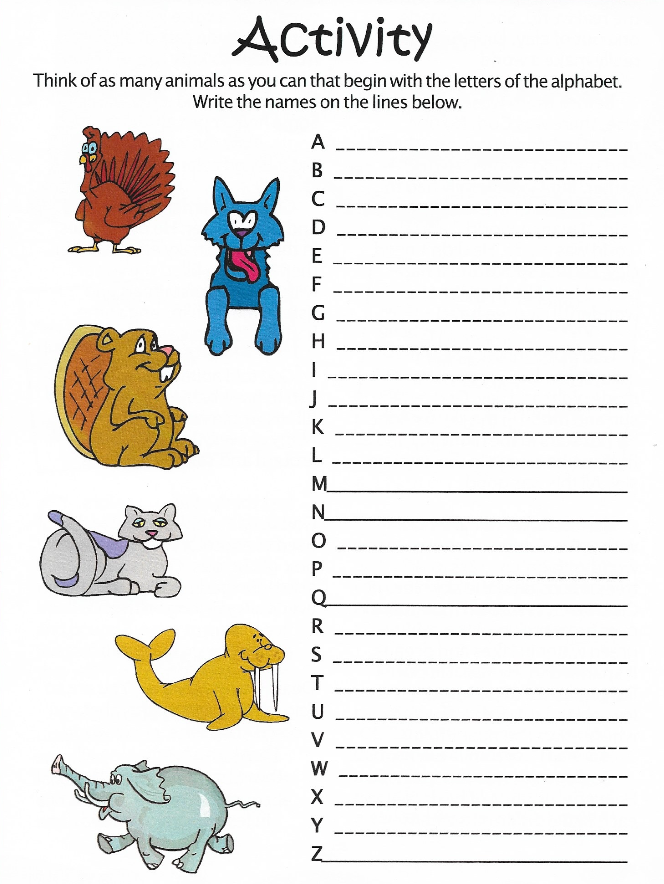
2. Pretend you are a zookeeper. Take the list of animals from your ABC animal activity in the YEA Student book. Design a zoo. What animals would go where?
3. Make a color wheel. Using an oatmeal carton, trace around the bottom to make a perfect circle on a piece of drawing paper. Use a ruler to divide the circle into six equal parts. Color one part red, and the next ones in order: orange, yellow, green, blue, and purple. Purple will end up next to red. What things are red? Write as many things as you can think of in the red part. Then write as many things as you can think of for the other colors.
4. Using homemade clay, form the clay into the letters of your name. Let the clay dry, then paint the letters with tempera paint. Glue them to a painted board and hang your name above your bed or on your bedroom door.
Homemade clay recipe: (www.familyfun.com)
1 cup flour
1 cup water
1⁄2 cup salt
1 tsp. vegetable oil
1⁄2 tsp. cream of tartar
food coloring (optional)
Time needed: Under one hour.
* Mix all ingredients together in a saucepan and cook over medium heat until the mixture holds together (keep mixing to prevent it from sticking to the bottom of the pan).
* When the clay is cool enough to touch, your child can knead it on a floured board.
Tips when making clay:
This clay’s long drying time makes it most desirable as a play dough (it’s easy to roll into ropes and balls), and sculptures will eventually dry. If stored in an airtight container, this dough will last, refrigerated or unrefrigerated, for two to four weeks. If the dough gets dry, revitalize it with a few drops of water. If it’s too sticky, knead in more flour. As you work, cover any extra clay with a damp cloth or plastic wrap to keep it from drying.
To join two pieces of clay, dab a drop of water on the surfaces to be joined, then press them together. If the pieces come apart when dry, reattach them with white glue.
For extra fun, mix a few spoonfuls of glitter into your dough and make sparkly sculptures.
For making patterns in the clay, let your child experiment with a few tools, such as cookie cutters, drinking straws, an old garlic press, forks, combs, coins, shells, or buttons.
For easier clean-up, have your child work with the clay on taped-down wax paper, a plastic tablecloth, or a plastic cutting board.
5. Make a painting of your home (or favorite place) with watercolor paints. Once it dries, print your memory verse across the bottom of the page.
6. Sing: “He’s Got the Whole World in His Hands” on page 54 of Kids Classics Collection.
7. Collect about 12 animal pictures from magazines or old calendars. Make a collage of the pictures. Then write the memory verse for this week across the bottom of the collage with a permanent marker.
8. Do a sword drill. Use the Daily Devotional Scriptures in the YEA book, Color My World. Read out the Scripture reference. Then start the timer. When the child has found the verse, stop the timer. Read the verse and talk about how it relates to the lesson. Challenge the child to see how quickly he/she can find each of the verses in the Bible. The sword drill works well as a competition game if you have more than one child.
9. Write: “It Was Good!” in bubble letters across an 11 x 17 paper. Write this week’s memory verse inside the letters with a black marker. Then color the letters.
10. Pretend you are a gardener. What would you plant in your garden? Make a list. Decide how big to make the garden and what you will plant where. Draw a diagram of your garden.
11. Day 1 of creation: In a darkened room, turn on a flashlight. The dark and light symbolize the first day of God’s creation. As someone holds the flashlight against a wall, perform finger plays. This activity can also be used with a dark background and a flashlight.
12. Day 2 of creation: With the longest side of a piece of paper closest to you, draw and color the sky with one shade of blue. Use the other shade of blue to draw and color the water. Set aside. This drawing will also be used on Day 3 of creation.
13. Day 3 of creation: Add land, seas, trees, plants, and flowers to the sky and water picture from Day 2 of creation.
14. Day 3 of creation: Talk about favorite fun activities to do on land and sea. Who enjoys those fun activities with you? Make a special card that shows you and someone doing those fun activities together. On your card thank that person for enjoying God’s creation with you. Send or give him/her the card.
15. Day 3 of creation: Seeds need to be planted in good, healthy soil and they also need to be watered. Try growing seeds in a clear, plastic cup or container. Use a notebook to record information about your plant as it grows. What kind of seeds did you plant? How often does it need to be watered? Will it continue to grow in the house, or does it need to be moved outdoors? Will it need to be planted in the ground? Draw pictures of your plant in your notebook as it grows.
16. Day 4 of creation: Find pictures in old magazines showing scenes of night and day. With the longest side of a piece of paper closest to you, fold in half. Label the top of one side NIGHT and the other side DAY. Glue the pictures under the correct label. Discuss what is happening in each picture. Ask what different activities can only be done at night? During the day?
17. Day 4 of creation: Draw fun things to do at night; fun things to do during the day. Label each picture with the reason why each is a fun thing.
18. Day 4 of creation: Make a mobile of the sun, moon, and stars. Use paper to make the sun and moon phases. Use the foil to make the stars.
Making a Mobile:
Cut out the shapes desired for reinforcing the lesson (i.e., sun, moon, stars). Use heavy cardstock for the shapes. Using a single hole punch, punch a hole in the center of the top of the shape. Thread different lengths of yarn, string, or fishing line through the different shapes. This will allow the shapes to dangle at different levels. Tie the tops of the strings onto a hanger. Spread them out along the hanger so the hanger is balanced. To display the mobile, the hook on the top of the hanger can be twisted perpendicular to the rest of the hanger in order to hang the finished mobile over a curtain rod.
19. Day 5 of creation: On poster board, draw a picture of an aquarium. After using an encyclopedia or other reference book, use construction paper to make fish to glue in the aquarium. Write the Scripture verse from Genesis which explains what God created on Day 5 on the bottom or top of the poster board.
20. Day 5 of creation: Make a bird feeder.
Cereal Bird Feeder Directions:
Materials: Donut-shaped cereal (i.e., Cheerios), yarn
Directions: Cut a piece of yarn to one and a half or two feet long. Tie a pencil or any other object about the same size on one end of the yarn. String the cereal onto the yarn. Remove the pencil and tie both ends of the yarn together. Hang outside!
Cookie Cutter Bird Feeder Directions:
Materials: Stale bread slices, cookie cutters, yarn
Directions: Use the cookie cutters to cut stale bread into various shapes. Poke a small hole in the center of the bread shape (a straw works well). String yarn through the hole and tie. Hang outside!
21. Day 6 of creation: Record the sounds of several animals using a tape recorder. Have someone listen to the tape and identify the animals from the sounds.
Song
“My God Is So Big" is on page 14 of the Kids Classics Collection.
Closing Prayer
Lead the students in prayer thanking God for such a wonderfully planned creation that is so beautiful.
Printable Pages